28 Sept 2014

Autumn Make Up Look


I have really been getting into the Autumn spirit recently and thought that today I would share my go to Autumn make up look. 

Now before I apply any make up I wash my face and apply my moisturiser and eye cream. Then I start with the Benefit POREfessional primer. Now if you have read my blog before you will know how much I love this primer and see it pop up quite a bit! Then I like to use the No7 Essentially Natural foundation and I only like to apply this to the areas of my face that need a bit of coverage and evening out. I will then take the Rimmel Hide the Blemish Concealer and cover any blemishes and under eye circles. I would usually then dust a bit of powder over to set my base in place, the reason there is not a powder pictured above is because at the moment I have run out of my current powder and I am on the search for a new one.(If you have any suggestions I would love to hear which powders you like!)
To finish off my face I like to buff some of the Benefit Hoola bronzer on and contour a little. I then like to use the Balm Mary-Lou Manizer and lightly highlight above my cheek bone.

Now onto my eyes! First I like to use the Benefit Gimme Brow to fill in and neaten up my brows. For my eye look I am using the Urban Decay Naked palette. Below are the shades that I used to create the eye look. First I apply the shade VIRGIN and pat this all over my lid. I also like to use this shade to highlight under my brow and in the inner corner of my eye. I then take the shade NAKED and pat this onto my lid from the outer corner of my eye and take this shade about 2/3 across my lid. I then buff the shade BUCK into my crease and also line this shade under my eye. Then using the shade HALF BAKED I blend a little into the crease and also pat a little into the centre of my eye and blend, blend, blend. Lastly I use the shade SMOG on the very outer corner of my eye and blend it well. I also like to blend this shade onto the outer corner of my bottom lash line. When doing this eye look make sure to blend all the shades well and it creates a pretty pretty Autumn eye look.


Then when I have finished the shadow I use the Benefit They're Real mascara and brush a little onto my lower lashes first then onto my top lashes. I love this mascara as it is so easy to create beautiful long lashes and I usually only really need to apply one coat.

Then to finish off the look I like to use a neutral shade on my lips. I have really been loving the Benefit Hoola lip gloss. It is gives your lips a lovely shine and what I love even more it that it isn't one of those horrible sticky lip glosses! 


So there is my current got to Autumn make up! What products do like using for this time of year? 
Love Bella x 


25 Sept 2014

Autumn Inspired Pinning

Now that we are well and truly in Autumn I have been loving scrolling through Pinterest looking at all the Autumn themed pins. I have pinned many different Autumn themed pins from nail art to pumpkins, apple pies to candles and many more! I think it is such a lovely way to get inspired for the new season! Below I have put some screen shots of my Autumn board on Pinterest. If you are interested to know what else I have pinned then just click on either image below or on the Pinterest link at the bottom of the post or on the sidebar. If you are also on Pinterest then don't forget you can also follow this board as well as all of my other boards. If you have also created an Autumn/Fall board on Pinterest then you are more than welcome to leave your link below as I would love to see what you have been pinning too! 


What are your favourite things about Autumn? Have you created an Autumn board on Pinterest?
Love Bella x 


22 Sept 2014

Nails of the Day


For today's nails I have decided to go for a french manicure. I haven't done a french manicure in so long, and as I wanted to have something different to a colour polish or nail art this was the perfect option. I used to love having a french manicure and it was my go to nail look. I had completely forgotten how much I love to wear my nails like this. I am defiantly going to make more of an effort to have a french manicure more often. The polishes that I used for this are of course a top and base coat and the Rimmel white tip polish and Essie's 'ballet slippers'.

Do you also love a french manicure? What is your go to nail look?
Love Bella x 


18 Sept 2014

Blogging Tips / Making A Custom Blog Header

As I have recently given my blog a 'make over' I thought that I would share how to create a blog header. I had a lot of trouble finding a tutorial that was easy enough for me to understand (as I don't have lots of programs to create headers or am I very good with a lot of tech codes!) So in the end I just used the knowledge I already had and managed to create a header, hooray! I wanted my header to be quite simple to fit my new 'minimalist' blog template, but you can create your header however you want it to look. Anyway enough rambling and onto the tutorial! (This is a tutorial for blogger blogs)


First of all you will want to find out the dimensions of your blog so that your header fits in to the template. To do this all you need to do is log into your blogger account, click on Template and then click on Customise


Then when you are on the template click on Adjust Widths and make a note of the number of px


I am using a photo editing site called PicMonkey to create the header.
Click on upload and upload a plain white picture, a picture you want as your background on your header, etc. 


Then click on the top icon (basic edits) and scroll down to the Re-size button and click on it. This is then when you enter the number of px of your blog template in the first box and in the second box enter whatever number you want so that you get the header looks how you want it too, then click on Apply.


Now onto creating the look of your header. Add your blog name/title by clicking on the Text button. Choose the font you like best and then type in your blog name/title. From there you can change the size and colour and edit it to how you want it to look. 


You can either leave it like that or add in other things. If you wanted to add images just click on Overlays. From there you can add any from the site or even upload a picture of your own.


When you are happy with how it looks click on Save and save it to your computer. 


Then go back to your blogger account and click on Layout. Then click on Edit on the header section. 


Then upload the image of your header and then click on Save. When you have done that click on the Save Arrangement button. 


Congratulations you have now created and added your own custom blog header! Now all you have to do is go out and get a celebratory nail polish/lipstick! (That is if you want to!)


I hope that this tutorial has helped, if you have any problems at all you are very welcome to ask me a question, and I will do my best to help you out! If you do create a header I would love to see it, so leave me a link in the comments or even tweet me your link! 
Love Bella x 


15 Sept 2014

You Beauty Discovery Box


This month I ordered a You Beauty Discovery Box. I have wanted to see what this little box was like for a while but have always left it too late in the month to order so a lot of the samples had already sold out. However this month I went over to the site at the beginning of the month and ordered my first box! 

So how does this box work? Well there is a selection of products to choose from some are sample size and full size. As well as your choice of two products from the list you also get some other samples to try in the box. There is also a magazine included in the box.

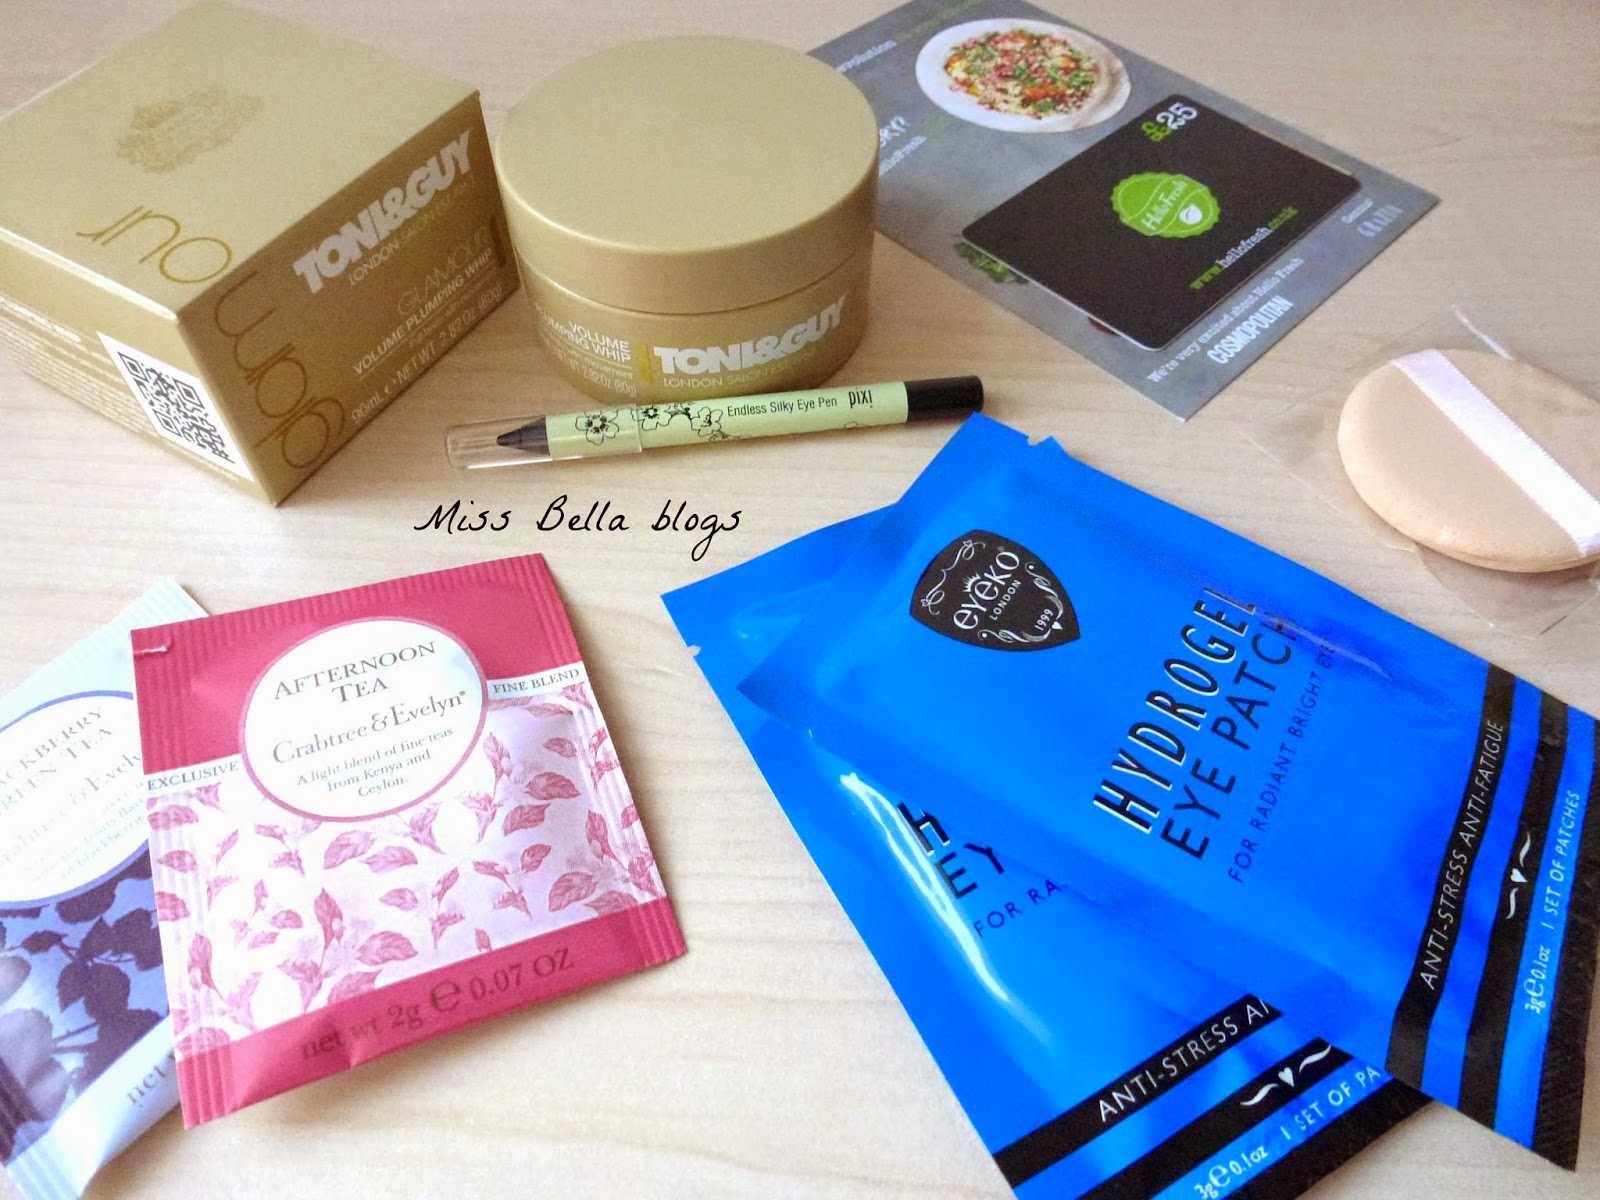
The two products I picked are the Pixi eyeliner and the Eyeko eye patches (both sample sizes). Also included is a Toni & Guy volume plumping whip, make up sponge, Hello Fresh £25 card and Crabtree & Evelyn teas. 

I am very excited to try out these different products. I am impressed with this beauty box and and think it is a very good value for money. I really like that you can choose some of the samples as you know that you will get something you want to try, as well as some surprise products too!  

What do you think of the You Beauty box? 
Love Bella x 


12 Sept 2014

Friday Five

The change of season from Summer to Autumn means that we can change from Summer makeup products to Autumn make up. I am excited to switch up my make up and and I have put together five products that I plan to be reaching for in the Autumn.


Benefit's Creaseless Cream Shadow in RSVP
This is such a beautiful neutral shade. It looks so pretty on it's own or as a base for other shadows.


Urban Decay Naked Palette
This palette has the best shades for Autumn. My favourite shade fro Autumn would be 'half baked' it is such a beautiful golden colour. 


Eyeko Skinny Liquid Eyeliner in Navy
Navy and blue eyeliners are the trend for Autumn/Winter make up this year. I am really liking this eyeliner in black at the moment so I am excited to try out some different eye looks with this Navy one!


Benefit Hoola Lipgloss
I am not a big lover of lip products but I really like the Benefit lipglosses as they don't have that horrible sticky feel to them at all. I think this really pretty bronze shade is perfect for Autumn when you want a more natural looking lip.


Essie Polish in 'A Cut Above'
This is such a lovely glitter top coat. I love the rose coloured glitter and think that it looks amazing over pale pink polishes. It is also a good way to add a bit of a darker colour to your manicure for Autumn.


Which make up products do you plan on using in the Autumn?
Love Bella x 


8 Sept 2014

Autumn Wishlist


As it is now Autumn, what better time than now to create an Autumn wishlist! So I have been looking around online and have put together some of my favourite things perfect for Autumn. I am really liking neutral colours at the moment and think that they are perfect for Autumn. 


What's on your Autumn wishlist? 
Love Bella x 


4 Sept 2014

New Blog Look


As you may have seen I have changed my blog design. I have wanted to change my blog design for a while now and after looking at lots of different designs/templates available and not finding one that I really loved (or in my price range) I decided to create my own. I am definitely not someone that can create those wonderful blog designs, but after goggling some tutorials and playing around with the template and settings I managed to create a blog design that I like. I prefer the new clean and simple look as I thought that my other blog design was a bit busy and messy before. Anyway enough of my rambling as I just wanted to do a quick post to keep you all up to date!

What do you think of my new blog design?
Love Bella x